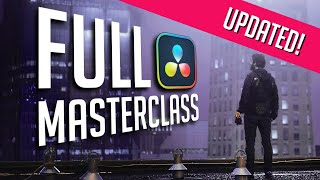
Introduction to DaVinci Resolve - [Full Course] for Beginners (2026)
Introduction to DaVinci Resolve - [Full Course] for Beginners (2026) - Summary and Notes
This comprehensive course by Casey Faris provides a beginner-friendly introduction to DaVinci Resolve 20. It covers the essential aspects of post-production, including media management, editing, cutting, compositing, color grading, audio mixing, and delivery. The course emphasizes hands-on learning and aims to empower viewers to create their own videos. It offers a detailed walkthrough of the different pages within DaVinci Resolve.
**Key Takeaways:**
* DaVinci Resolve is a powerful, professional-grade video editing software that offers a free version with extensive features.
* The software is divided into "pages," each designed for a specific task in the post-production workflow.
* The course covers the basics of each page: Media, Edit, Cut, Fusion, Color, Fairlight, and Deliver.
* The course stresses that good color grading starts with good footage.
* The video emphasizes the importance of practice, patience, and hands-on experience.
**Detailed Notes:**
**I. Introduction (0:00:00 - 0:01:24)**
* The video is designed as a comprehensive introduction to DaVinci Resolve.
* Offers a free introductory course that previously cost hundreds of dollars.
* Aims to enable viewers to create their own videos.
* It covers everything from media management, to putting clips in the timeline, color grading, compositing, audio mixing, and final delivery.
* Viewers are encouraged to download footage and follow along.
**II. What is Resolve? (0:01:24 - 0:09:27)**
* DaVinci Resolve is video editing software, also used in Hollywood for major films and TV shows.
* It's a one-stop shop for post-production tasks: media management, timeline creation, graphics, effects, color correction, and audio mixing.
* It has a free version with great features.
* **Free vs. Studio Version:**
* Free version is recommended for beginners.
* The free version covers most of the video's content.
* Upgrading to the Studio version ($295) unlocks features like Resolve effects and AI tools.
* Resolve is split into different pages: Cut, Edit, Fusion, Color, Fairlight, and Deliver, each with a different job.
* These pages are accessed via buttons at the bottom of the interface.
* The media page's job is to manage media.
* Resolve uses a project manager, a project library, which lives on your system, and network libraries.
* Projects are saved as DRP files.
* Cloud libraries allow for collaborative editing.
**III. The Media Page (0:09:27 - 0:28:57)**
* The media page is designed for media management.
* It's perfect for importing media and getting everything organized.
* The media page has two main sections for looking at footage.
* The media storage panel: This panel helps you navigate to all media that you want to bring into Resolve.
* The media pool: Anything that's here actually lives in your project.
* The Media Storage Panel is a way to navigate on your system to any media that you want to bring into Resolve.
* You can also right-click in the Media Pool and import the media or drag the media to the Media Pool from your system.
* You can create bins in the Media Pool to organize footage (right-click > new bin).
* You can also use the rightclick and go to export project. That will allow you to save a copy of your project to your desktop or to an external drive or to cloud storage or whatever you want to do. And that will make a DRP file that's short for Da Vinci Resolve project.
* Multiple Libraries can be added to a project.
* You can add an icon to the side for each project that will open up a file location.
* Media Pool has views: Thumbnail, list, and metadata.
* The metadata panel is really good for organizing footage. You can add notes about the footage.
**IV. The Edit Page (0:28:57 - 1:30:44)**
* The edit page is the hub for all of the things that happen in your video.
* This is where we take all of the clips that we have in our project.
* It's all about building a story.
* There are pages
* Source viewer: double-click to see the video.
* Timeline viewer.
* This isn't just switching the layout. This is actually switching a different mode of creating.
* Trim. Trim off excess.
* Keyboard shortcuts
* T is for Trim.
* A is for your normal selection mode.
* S is for split.
* In the Cut page we had these edit buttons, these are called insert edit buttons.
* This is what the edit buttons look like.
**V. The Cut Page (1:30:44 - 1:43:14)**
* The cut page is designed for speed and is an alternate editing interface to the edit page.
* It's built for a slightly different application.
* It's designed with the one value in mind: speed of editing.
* In the cut page.
* You have two timelines.
* Top is overview
* Bottom is for the detailed.
* Often times, if you add a clip in the Edit page, it'll put it right into the timeline where you want it to be.
**VI. The Fusion Page (1:43:14 - 2:50:20)**
* Fusion is the compositing tool within Resolve.
* Compositing means combining multiple elements together to create a final image.
* Nodes are fundamental to Fusion. Each node is a box with one job, forming a visual flowchart.
* The yellow inputs are for linking other nodes together.
* A fast noise node makes a texture
* A merge node puts one image over another image.
* The blue is for limiting, such as the polygon mask.
**VII. The Color Page (2:50:20 - 4:16:55)**
* The color page is where you grade and adjust your footage.
* This is what you see. Each part has a function,
* You can also have many tools that have more functions in them.
**VIII. The Fairlight Page (4:16:55 - 4:53:00)**
* Fairlight is the audio app within Resolve.
* This is where you will work with all the audio tracks.
* This is the the audio page of Davinci Resolve.
* You can do lots of edits here.
* Audio, track header, meters, etc.
* You can use the rightclick on the track name and color code it.
**IX. The Deliver Page (4:53:00 - 5:05:42)**
* The Deliver page is used for exporting your finished video.
* It's where you convert your project into a movie file that people can watch.
* You choose format, codec, and other settings here.
* H.265 - looks great and is smaller file size. (May require the paid version)
* You can also render videos as clips.
* ProRes is a good option for quality.
**X. How to Learn Resolve the BEST WAY (5:05:42 - 5:07:44)**
* Download the free DaVinci Resolve software.
* Set up an external drive for your project.
* Set a good workflow and make a consistent structure.
* Practice. Put your hands on the software and experiment.
**XI. Troubleshooting/Additional Resources**
* Download the media and follow along.
* Check out the Ground Control Film FAQ section.
* Check the Ground Control Film "Make a Film in Resolve" section.
* DaVinci Resolve Fusion Courses can be found.
Related Summaries
Why this video matters
This video provides valuable insights into the topic. Our AI summary attempts to capture the core message, but for the full nuance and context, we highly recommend watching the original video from the creator.
Disclaimer: This content is an AI-generated summary of a public YouTube video. The views and opinions expressed in the original video belong to the content creator. YouTube Note is not affiliated with the video creator or YouTube.

![[캡컷PC]0015-복합클립만들기분리된영상 하나로 만들기](https://img.youtube.com/vi/qtUfil0xjCs/mqdefault.jpg)
